


2022+ GR86/BRZ Reverse Light Overlay
Dark Smoke/Light Smoke Tinted Reverse Overlay
Features air release technology for incredibly easy installation.
Made in the USA.
Dark Smoke/Light Smoke Tinted Reverse Overlay
Features air release technology for incredibly easy installation.
Made in the USA.
Dark Smoke/Light Smoke Tinted Reverse Overlay
Features air release technology for incredibly easy installation.
Made in the USA.
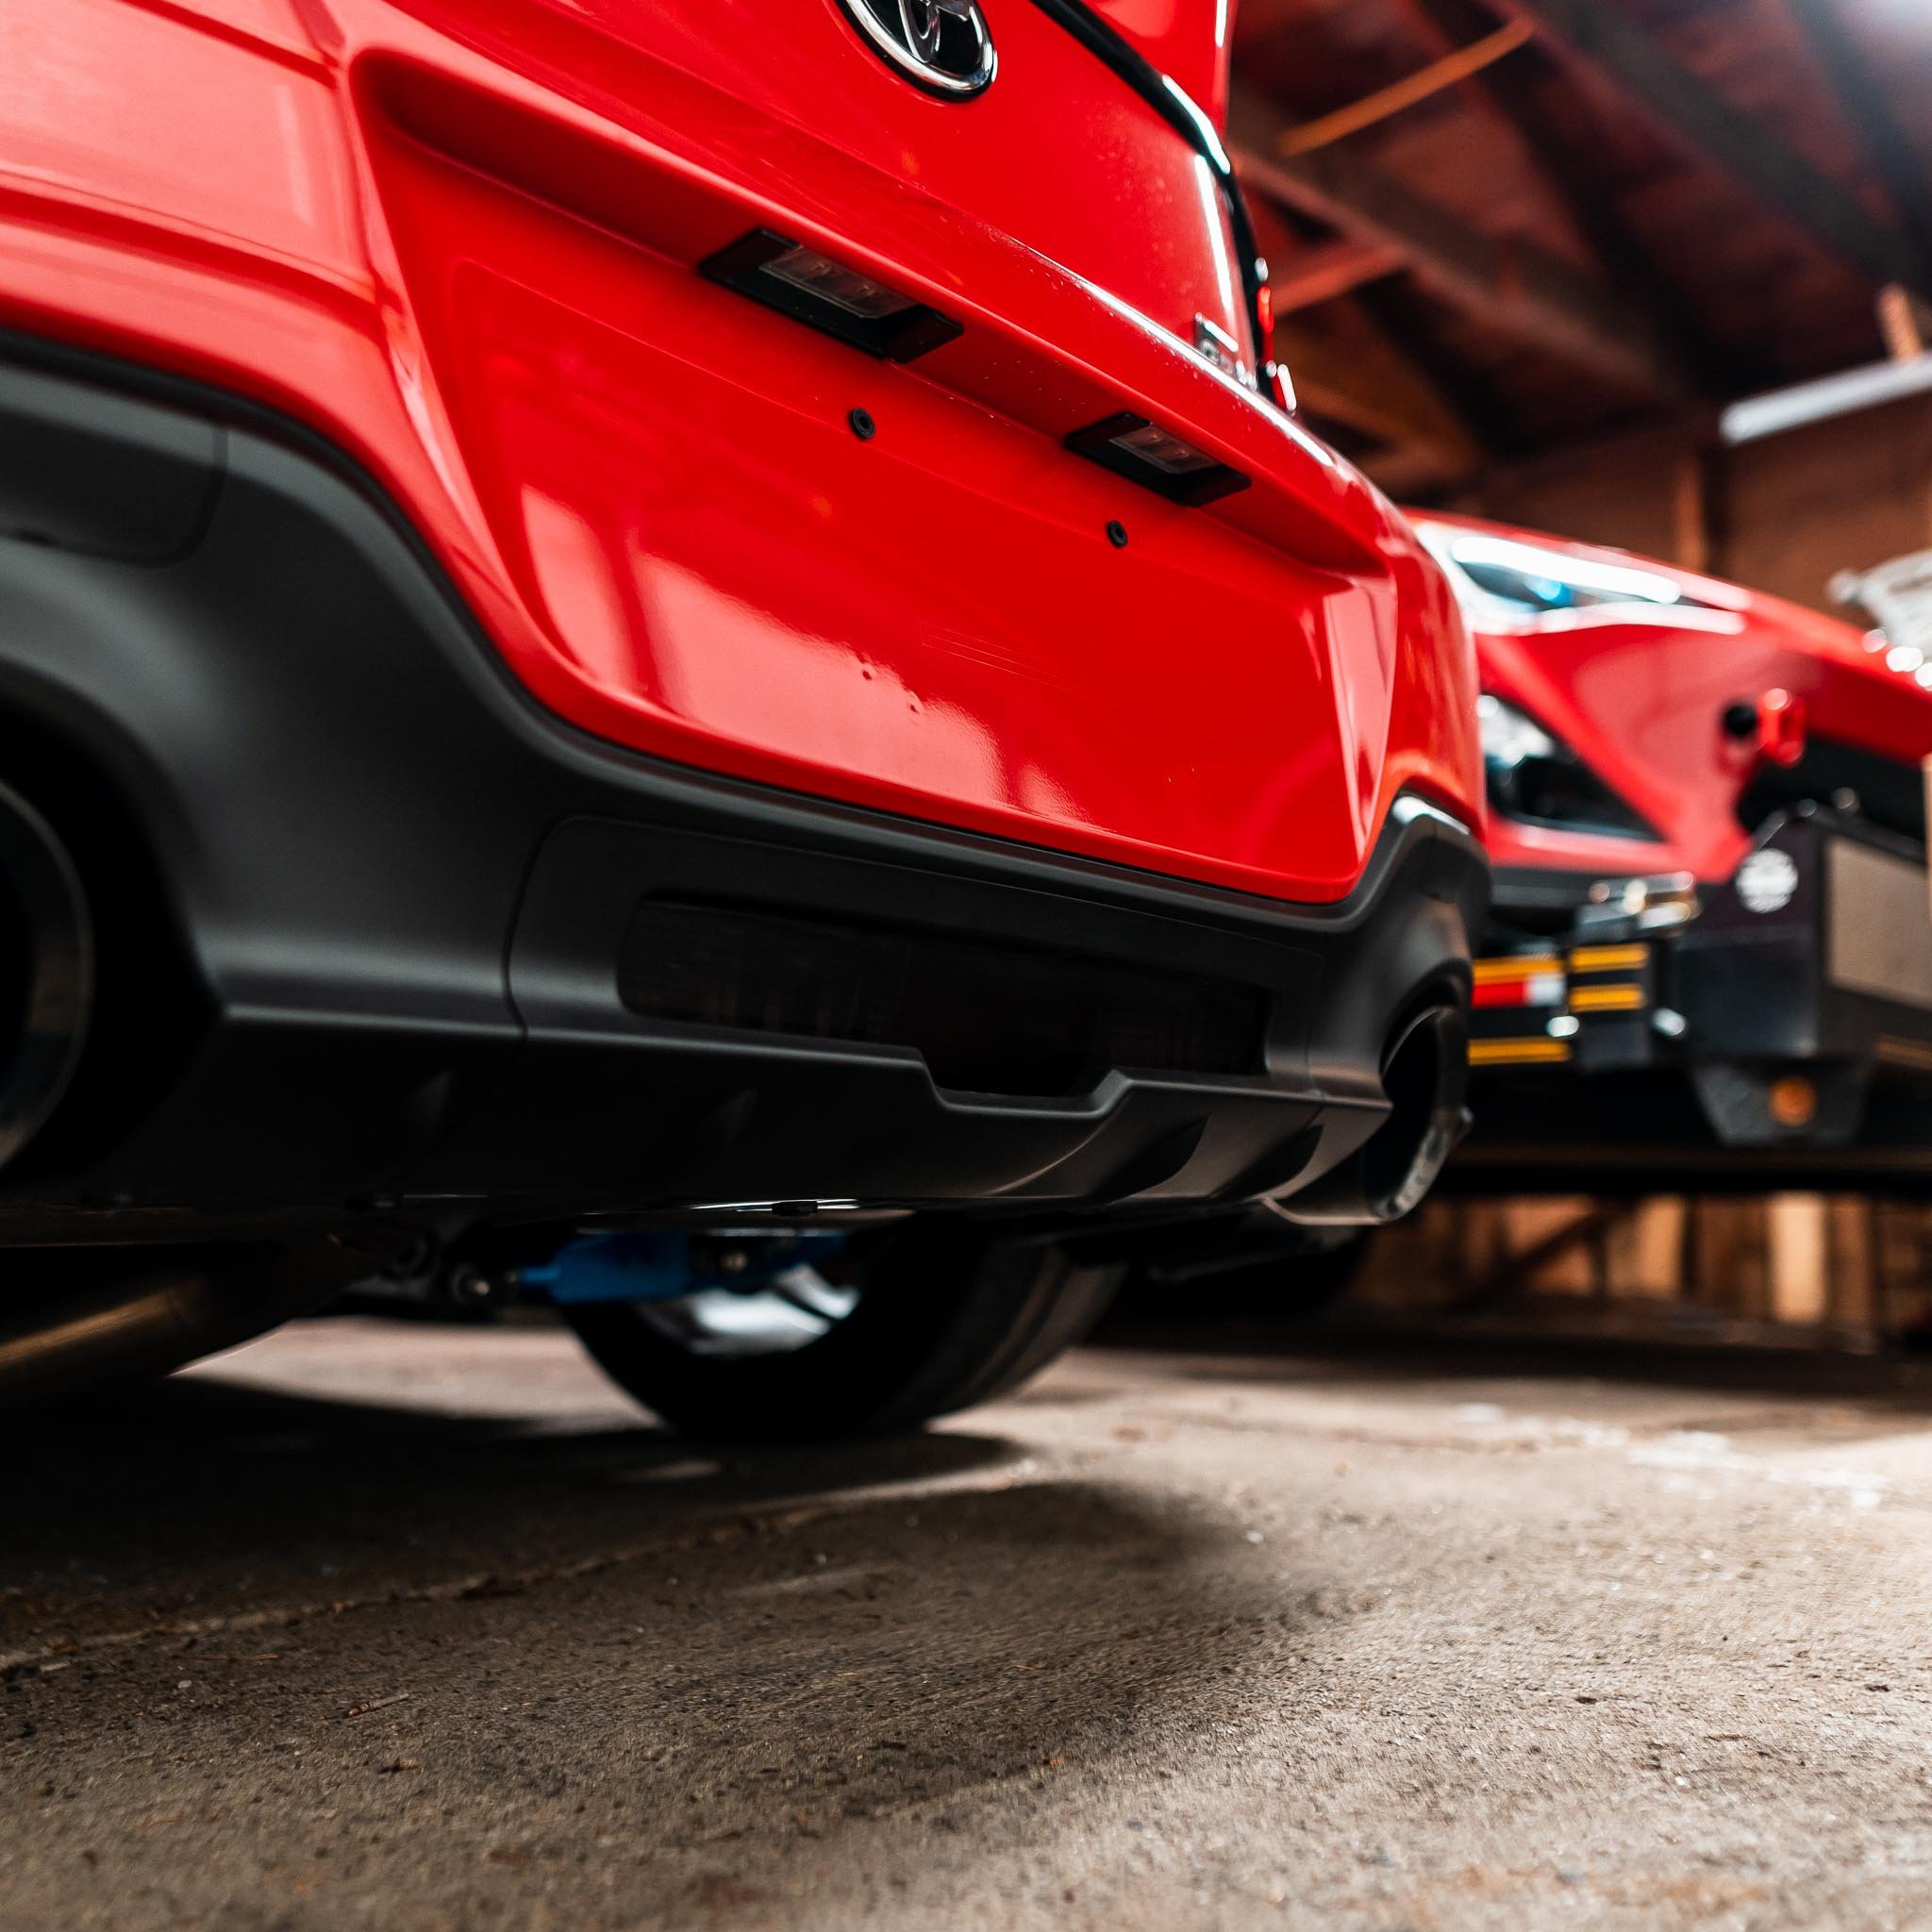
Unfortunately, Subaru and Toyota decided to use practically the same design for the reverse light on the 2nd generation. It’s a bit of a dated design for a modern looking car. With the our Reverse Light Overlay, it truly blends into the bumper giving the rear end of the car a cohesive appearance while still remaining functional as you can see in the photo with the reverse lights on. Car in photo has LED reverse lights installed.
These overlays are designed and cut in-house using high-quality vinyl to ensure proper fit and finish
Installation Instructions
Installation requires the removal of the plastic cover around the reverse light.
Remove the 3 pop clips on the underside of the bumper and then you’ll be able to pull the cover off.
Prior to applying the overlay, make sure the surface is thoroughly cleaned and dry.
Carefully peel the overlay off of the backing and use the outline of the inner lens of the reverse light to line up the overlay. (Since the bumper covers a portion of the light, this doesn’t need to be exact as we’ve designed the overlay to give you some leeway.)
Once you have successfully positioned the overlay where you want it, use a vinyl squeegee or microfiber to remove any air bubbles.
We recommend allowing at least 48hrs before washing the car to allow for the adhesive to cure and avoid directly spraying them with a pressure washer.
The temperature needs to be a minimum of 65°F for proper application.